This example will show you how to use Spine, Hem and Eco to build a basic contacts manager.
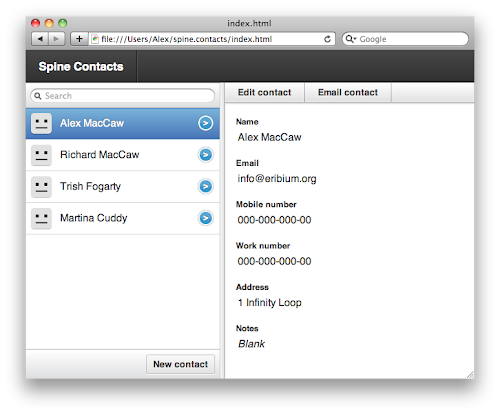
Some of the source will be omitted for the sake of brevity (such as the CSS). You can find the complete source on GitHub, as well as a live demo. This is what we’ll end up with:
Before we get started, I advise you to do the following:
- Gain a basic understanding of CoffeeScript
- Read the Introduction to Spine
- Skim the guides on the main Spine classes, such as Models and Controllers
Now you’ve got all that under your belt, let’s think about what we need in this Contact’s application from a high level architectural standpoint.
- A Contact model to store and persist contacts
- A way of creating contacts
- Listing contacts
- Editing existing contacts
- Deleting contacts
Basically your classic CRUD methods. Let’s get started!
Setup
Firstly, to make life easier, we’re going to install Spine.app and Hem. Spine.app is a Spine application generator. It’s not required to use Spine, but very useful all the same. Hem is bit like Bundler for JavaScript apps, see their respective guides for more information.
If you haven’t got them installed already, you’ll need Node and npm. Both projects’ sites include excellent installation instructions. Now we can get on with installing the two npm modules we need, spine.app and hem:
npm install -g spine.app hem
Now we’ve got an executable called spine which we can use to generate new applications.
spine app contacts
cd contacts
Check out the article on Spine.app for more information concerning its usage. Now let’s install the default dependencies listed in our application’s package.json:
npm install .
Finally we can use the hem executable to run a Hem server, which will temporarily host our Spine application during development.
hem server
Now our server is running, let’s open up the application:
open http://localhost:9294
You’ll see Spine’s default welcome screen introducing you to the framework. Let’s remove that before we go any further. Open up public/index.html, and remove the ‘getting started’ script tag:
<!-- Getting started script - should be removed -->
<script src="http://maccman-spine.herokuapp.com/start.js" type="text/javascript" charset="utf-8"></script>
Refresh the page, and it should be blank.
Generate
Let’s generate the basic models and controller’s our applications going to need. Firstly, a Contact model:
spine model contact
This will generate a model under app/models/contact.coffee which will come in handy later. Then let’s generate three controllers, Contacts, Main and Sidebar.
spine controller contacts
spine controller contacts_main
spine controller contacts_sidebar
These controller’s will be created under app/controllers. We could put all the controllers inside one file, but by splitting them up we’re de-coupling them, ensuring our code is clear and doesn’t descend into Spaghetti hell.
Contact model
So earlier we generated a Contact model. Let’s flesh that out, and add some functionality. Replace app/models/contact.coffee with the following:
Spine = require('spine')

class Contact extends Spine.Model
  # Configure name & attributes
  @configure 'Contact', 'name', 'email'

  # Persist with Local Storage
  @extend @Local

  @filter: (query) ->
    return @all() unless query
    query = query.toLowerCase()
    @select (item) ->
      item.name?.toLowerCase().indexOf(query) isnt -1 or
        item.email?.toLowerCase().indexOf(query) isnt -1

module.exports = Contact
Ok, so that need’s some explaining. Let’s take that apart piece by piece. Firstly, we’re calling configure(), passing in the name of the model and its attributes. This is something you’ll need to do whenever you create a model, and it should be done immediately before anything else inside the model. As you can see, our Contact model is going to have two attributes, a name and an email.
The next line ensures our model is persisted with HTML5 Local Storage. Spine’s Local Storage module is included by default in our generated application, so this line is all that’s required to make sure that model data is persisted between page reloads.
The last part of the model is a class (static) function called filter(). This takes a query string and returns an array of contacts that match that string, comparing both the email address and name of each contact stored in the model. This function will come in handy in our sidebar, allowing us to filter the list of contacts easily.
Lastly the model is exported, so it’s available to be required from other modules.
ContactsMain
Right, now our model is setup we can move onto the controllers. Let’s tackle the Main controller first. Replace the contents of app/controllers/contacts_main.coffee with the following:
Spine   = require('spine')
Contact = require('models/contact')
$       = Spine.$
That sets up some variables we’re going to use, such as the Contact model and jQuery.
The main section of our application is going to have two main ‘views’, a show view and an edit view. This will translate into two controller’s Show and Edit respectively. We want to make sure only one of these controller is shown at any one time, so we’re going to use a Stack to manage them.
So let’s go ahead and implement the Show controller, appending the following to app/controllers/contacts_main.coffee:
class Show extends Spine.Controller
  # Set the HTML class
  className: 'show'

  events:
    'click .edit': 'edit'

  constructor: ->
    super

    # Bind the change() callback
    # to the *active* event
    @active @change

  render: ->
    # Render a template, replacing the
    # controller's HTML
    @html require('views/show')(@item)

  change: (params) =>
    @item = Contact.find(params.id)
    @render()

  edit: ->
    # Navigate to the 'edit' view whenever
    # the edit link is clicked
    @navigate('/contacts', @item.id, 'edit')
So, the first property in Show is className, which set a class of show on the controller’s internal HTML element. This will help us style the controller later.
Next we’re setting up some events, specifically a click event on any element with a class of edit. In this case, our template is going to contain a <a class="edit">Edit</a> link which, when clicked, will invoke the controller’s edit() function, navigating to the edit route.
In the controller’s constructor, we’re binding to the active event, specifying the change() function as a callback. We’re going to pass some router params when triggering the event, which will be used by our callback to find the relevant contact, and then re-render the view. This part will make more sense when you see how the controller is activated later on in the tutorial.
Notice in the render() function we’re requiring a template under views/show, calling it and passing in the current item. Let’s go ahead now and define that template. Create a file under app/views/show.eco containing the following:
<header>
  <a class="edit">Edit</a>
</header>

<div class="content">
  <p><%%= @name %></p>
  <p><%%= @email %></p>
</div>
This is an eco template, and the syntax inside the template tags (<%%= %>) is CoffeeScript. We’re pulling out the name and email properties from the contact, displaying them in the page. We’ve also got that edit link we talked about earlier, ready to be clicked.
#Edit controller
Now we’ve defined our Show controller which will show us information about the selected contacts, we can go ahead and define an Edit controller for updating contacts. Append the following to app/controllers/contacts_main.coffee.
class Edit extends Spine.Controller
  className: 'edit'

  events:
    'submit form': 'submit'
    'click .save': 'submit'
    'click .delete': 'delete'

  elements:
    'form': 'form'

  constructor: ->
    super
    @active @change

  render: ->
    @html require('views/form')(@item)

  change: (params) =>
    @item = Contact.find(params.id)
    @render()

  submit: (e) ->
    e.preventDefault()
    @item.fromForm(@form).save()
    @navigate('/contacts', @item.id)

  delete: ->
    @item.destroy() if confirm('Are you sure?')
In a lot of ways, this is really similar to the Show controller. We’re binding to the active active event with a change() callback, rendering a template with the appropriate contact context. The only real difference here is there’s a few more events, mostly dealing with the controller’s form. When the form submits, the submit() callback will be invoked and the item updated from the form’s inputs (using fromForm()).
Again, we’re requiring a template under views/form, rendering it with the current contact (@item). Let’s define that template under app/views/form.eco:
<header>
  <a class="save">Save</a>
  <a class="delete">Delete</a>
</header>

<div class="content">
  <form>
    <label>
      <span>Name</span>
      <input type="text" name="name" value="<%%= @name %>">
    </label>

    <label>
      <span>Email</span>
      <input type="email" name="email" value="<%%= @email %>">
    </label>

    <button>Save</button>
  </form>
</div>
It’s pretty self explanatory; again we’re just pulling out properties from the current context using the <%%= %> syntax.
#Main Stack
The last step for our Main controller, is to define a stack that will manage our other two controllers, Show and Edit. Both controllers, Show and Edit, need to be shown independently one at a time. Adding both controllers to a Spine Stack will ensures this happens automatically.
class Main extends Spine.Stack
  controllers:
    show: Show
    edit: Edit

module.exports = Main
The last line exports the controller, so it’s available to other modules (see the CommonJS guide for more information). The full source for this controller is available on GitHub.
Contacts Sidebar
The Sidebar controller is going to list contacts and let users filter them by name and email. Additionally users’s can select a contact, which is then displayed in the main view.
Although this controller is fairly large, it’s pretty straightforward. Let’s take a look at the full code, and then I’ll explain it in detail. Replace app/controllers/contacts_sidebar.coffee with the following:
Spine   = require('spine')
Contact = require('models/contact')
List    = require('spine/lib/list')
$       = Spine.$

class Sidebar extends Spine.Controller
  className: 'sidebar'

  elements:
    '.items': 'items'
    'input[type=search]': 'search'

  events:
    'keyup input[type=search]': 'filter'
    'click footer button': 'create'

  constructor: ->
    super
    # Render initial view
    @html require('views/sidebar')()

    # Setup a Spine List
    @list = new List
      el: @items,
      template: require('views/item'),
      selectFirst: true

    @list.bind 'change', @change

    @active (params) ->
      @list.change(Contact.find(params.id))

    Contact.bind('refresh change', @render)

  filter: ->
    @query = @search.val()
    @render()

  render: =>
    contacts = Contact.filter(@query)
    @list.render(contacts)

  change: (item) =>
    @navigate '/contacts', item.id

  create: ->
    item = Contact.create()
    @navigate('/contacts', item.id, 'edit')

module.exports = Sidebar
Ok, so that’s a fair amount of code that needs some explaining. In a nutshell, the Sidebar controller sets up a Spine List, populates with contacts and handles filtering.
The elements property is setting up some references to various HTML elements we’ll need subsequently in the class. The format is {elementSelector: propertyName}, and ensures that references to properties such as @items and @search point to the appropriate elements.
The events property sets up some event delegation, namely the contact filtering when users type in a search input, and responding to a click event on a ‘contact create’ button. The two callbacks referenced, @filter() and @create() are pretty self explanatory; @filter() merely pulling out a query from the search input, and re-rendering the list, whilst @create() makes a blank contact, navigating to the ‘edit’ route.
The Sidebar‘s constructor is where all the magic happens, and where the list of contacts is setup. The first step is to replace the controller’s HTML with the views/sidebar template (which we’ll define later). Next, we’re instantiating a Spine List, passing in the .items element reference, the list template and some additional options. The list will take care of rendering and selecting contacts, we just have to add a change event listener onto it to know when a user selects a different contact.
Also notice we’re binding to two events, refresh and change on the Contact model. These will be fired whenever the model fetches its records (i.e. on startup), and whenever a record changes (i.e. is created, updated or destroyed). Whenever these two events fire, we’re just going to redraw the whole list, reflecting model changes in the view.
Two templates were mentioned in the controller, let’s tackle the first, views/sidebar. This is just going to contain a search input, a container for our list and a button to create new contacts. Replace app/views/sidebar.eco with the following:
<header>
  <input type="search" placeholder="search" results="0" incremental="true" autofocus>
</header>

<div class="items"></div>

<footer>
  <button>New Contact</button>
</footer>
The other template is the views/item template, used by the List for rendering list items. Replace app/views/item.jeco with the following:
<div class="item">
  <%%= @name or "<i>No Name</i>" %>
</div>
Notice we’re using the .jeco extension for this template, rather then .eco. This is a Hem specific extension to Eco, which allows us to associate data with template items, something the Spine List class requires.
The full source for this controller, and all its templates, is available on GitHub.
Contacts controller
So we’ve got a Sidebar controller for listing contacts, and a Main controller for showing/editing them. The last step is to tie these two together by using Spine’s routes. This we’ll do in the Contacts controller; replace app/controllers/contacts.coffee with the following:
Spine   = require('spine')
Contact = require('models/contact')
$       = Spine.$

Main    = require('controllers/contacts_main')
Sidebar = require('controllers/contacts_sidebar')

class Contacts extends Spine.Controller
  className: 'contacts'

  constructor: ->
    super

    @sidebar = new Sidebar
    @main    = new Main

    @routes
      '/contacts/:id/edit': (params) ->
        @sidebar.active(params)
        @main.edit.active(params)
      '/contacts/:id': (params) ->
        @sidebar.active(params)
        @main.show.active(params)

    @append @sidebar, @main

    Contact.fetch()

module.exports = Contacts
Right, so that’s a shorter controller than the previous two we implemented, lets have a look at what it’s up to. Firstly you’ll notice that we’re requiring in our other two controller’s Main and Sidebar. In the Contacts constructor these are instantiated, saved as local variables and ultimately appended to the controller.
We’re also setting up some routes, /contacts/:id and /contacts/:id/edit. Spine will listen to changes in the URL’s hash, and invoke the matched route callbacks. For example, if the user navigates to #/contacts/1, then the /contacts/:id route will be activated, and the Show controller activated. We’re passing through the route params, so our controllers change() callbacks can pull out the contact’s ID, and match it up with one from the model.
Lastly we’re calling Contact.fetch(), which fetches all the contacts out of local storage, populating the Contact model.
App controller
So our contacts app is now finished, and has all the functionality we need for listing, creating and updating contacts. So how do we actually go about instantiating it, adding it to the page? Well this is where the App controller comes in, Spine’s main controller. This is automatically instantiated and appended to the document’s body when the page loads.
All we need to do is instantiate Contacts controller, appending it to App. Replace app/index.coffee with the following:
require('lib/setup')

Spine    = require('spine')
Contacts = require('controllers/contacts')

class App extends Spine.Controller
  constructor: ->
    super
    @contacts = new Contacts
    @append @contacts

    Spine.Route.setup()

module.exports = App
Awesome! Refresh the page, and you should see your working contacts application (albeit unstyled). Remember, you can clone the complete source from GitHub if you run into any difficulties, as well as copy some attractive CSS.
Next steps
Congratulations if you’ve got this far. We’ve explored a lot of Spine, and you should have a good handle on the framework now. You’re all set to go off and create your own applications.