Spine’s architecture complements Rails apps, and the two sit really well together. Rails makes a great backend API for data storage and authentication, whilst Spine provides your application with an awesome front-end and user experience.
Architecture
You need to decide, based on the size and complexity of your Spine app, whether you’re going to base it inside your Rails project, or use something like Hem to serve it. If the app’s anything more than a simple widget, I recommend the latter approach. Regardless, the integration between Spine and Rails should be limited to a JSON REST API.
Ultimately, if you’re building a full featured Spine app, Rails should become no more than an API layer, abstracting the database, ensuring validation and providing authentication. Ideally your Spine app should exist totally independently from Rails, communicating through the API. The advantage to this approach is that you get a de-coupled application, and also an API for free, which you can then open up to other developers.
I’ve provided an example Rails app demonstrating Spine integration here: https://github.com/maccman/spine.rails3

There’s also a live demo of the application, go and give it a whirl. Notice that the UI is completely instant. There’s absolutely no places where it blocks, even after creating a record. Ajax requests are sent in the background to keep the server in sync.
If you do intend to serve up your Spine app through Rails, there are two approaches: Sprockets or Stitch. I’d recommend the former, as it’s much more compliant with the “Blessed Rails Way™”, and easier to setup.
Getting started with Sprockets
Rails uses Sprockets internally to manage JavaScript and CSS assets. Spine includes support for Sprockets integration through the spine-rails gem. First off, add the required dependencies to your Gemfile:
gem 'jquery-rails'

# Optional support for eco templates
gem 'eco'
# Or support for ejs templates (default without eco)
gem 'ejs'

# Embed Spine automatically
gem 'spine-rails'
Now you can use the spine-rails generators to create a directory structure for your Spine app. Let’s do that first by running:
rails generate spine:new
This will create the following structure for your Spine app under app/assets/javascripts:
app
app/lib
app/models
app/controllers
app/views
app/index.coffee
As you can see, your application is namespaced by app. You can specify a different namespace with the --app option. spine-rails has generated a initial index.coffee script that’ll bootstrap your application. It’s also add a require call to startup script to your app/assets/javascripts/application.js, so Spine will get loaded automatically.
Let’s demonstrate how easily Spine integrates with Rails. First, generate a Rails scaffold:
rails generate scaffold Post title:string content:string
And now let’s generate a Spine Model:
rails g spine:model Post title content
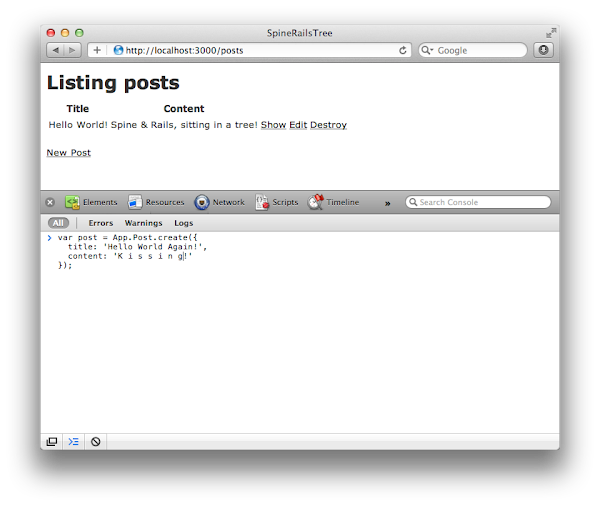
Run the migrations, boot up the server, and navigate to http://localhost:3000/posts.
Right, let’s have a play around with the Spine console and create some new records:
var post = App.Post.create({
  title: 'Hello World!',
  content: 'Spine & Rails, sitting in a tree!'
});

post.id; // Rails DB ID
As we’re creating, updating and destroying records, so the appropriate Ajax requests are being sent to Rails, keeping the database in sync.
If you reload the page, you’ll see all the records you created were persisted. Now we can fetch the records using Spine, persisting them in memory:
App.Post.fetch(); // Fetch records

App.Post.first().content;

App.Post.first().destroy();
Very simple indeed! As you can see, Spine works with Rails out the box. As well as models, spine-rails also lets you generate controllers and views.
rails g spine:controller posts
rails g spine:view posts/show
Scaffolding
We can use the spine-rails scaffold generator to replace the Rails scaffold, moving state in our application from the server to the client side.
rails g spine:scaffold post title content
This will generate a bunch of models, controllers and views with some basic scaffolding for CRUD actions on the Post model. You’ll notice under app/assets/javascripts/app/controllers there’s a new controller called Posts. In order for our scaffolding to work, we need to instantiate this controller, attaching it the page.
The easiest way to do this, and a way that leaves scope for further controllers, is by appending it to the main controller, App. You can do this by opening up app/assets/javascripts/app/index.coffee, and adding some code to its constructor.
class App extends Spine.Controller
  constructor: ->
    super

    # Instantiate & append the Posts controller
    @append(@posts = new App.Posts)

    #...
    Spine.Route.setup()
As you can see in the example above, we’re instantiating the App.Posts controller, appending it to the App controller. This will ensure that whenever App is instantiated, our scaffold will also be instantiated and appended to App‘s element.
Now we need to actually instantiate our App controller, giving it an element to render to. Replace app/views/posts/index.html.erb with the following:
<div id="app"></div>

<script type="text/javascript" charset="utf-8">
  jQuery(function(){
    // onready, instantiate App
    new App({el: $("#app")})
  });
</script>
When the page loads, the App controller will be instantiated, in turn setting up our scaffold. Notice we’re passing through a reference to a <div /> to App‘s constructor as the el property. This will ensure that our application will render on that element.
There’s one last step before we’re done, a snippet of CSS. Spine’s scaffolding uses Stacks to manage controllers, making sure only one controller (List, Edit, Create) is shown at any one time. It does this by adding or removing an active class on the controllers. We need to make sure that any controllers without this active class are hidden. Add the following CSS snippet to app/assets/stylesheets/application.css:
.stack > *:not(.active) {
  display: none;
}
That’s it! Refresh the page, and marvel in your handiwork!
Namespacing
CoffeeScript automatically wraps scripts in anonymous modules, so it doesn’t pollute the global scope. However, sometimes you’ll need to create global variables. You can create these by explicitly setting them on the window object.
class Contacts extends Spine.Controller
window.Contacts = Contacts
By default, all of the models and controllers generated by spine-rails are namespaced under the App object.
posts = new App.Posts
Next steps
So that’s the gist of Spine & Rails integration, and all you need to know to get started. Part 2 of this guide goes into specifics, but isn’t necessary for day to day development.
Some of the additional topics covered are:
- JSON prefixing
- Ajax & Rest
- ID changes
- Cross domain requests
Please see the Rails integration continued guide.